Wednesday, December 29, 2010

Kitchen Power Tools

My darling boyfriend Phil got me a totally unexpected present for Christmas, a KitchenAid Mixer! In the Maurer family, KitchenAid Mixers are reserved for wedding presents, so I was prepared to wait for mine. When I opened the box I thought it was a joke, just the box, no mixer, but behold, a Professional 600 Series KitchenAid Mixer in Meringue. Capable of making 8 pounds of mashed potatoes, 13 dozen cookies, and 8 1/2 loaves of bread. As Tim the Tool Man Taylor would say, "More POWER!".

Speaking of men, as I started making my first recipe with the mixer (pizza dough) what I had suspected all along was confirmed: I'm not the only one excited about this mixer. The conversation in the Kreiglemaurer house went as follows:

Phil: Did you wash the bowl?

Amanda: Yes.

Phil: Are you using the dough hook?

Amanda: Yes.

Phil: Did you wash the dough hook?

Amanda: Yes.

Phil: Are you using the mixer yet?

Amanda: Not yet.

Phil: You know the dough hook can only go up to speed 2.

Amanda: I know.

Phil: Why is the flour on the sides like that?

Amanda: I don't know.

Phil: Do you have to scrape the sides?

Amanda: I don't know.

Phil: How long do you let it knead for?

Amanda: PHIL I'VE NEVER DONE THIS BEFORE LEAVE ME ALONE!

At this point Phil took the hint and left the kitchen, but you better believe when this came out of the oven he came right back!

The pizza I made is a Cooking Light pizza recipe. I usually tweak and rewrite recipes but this one I wouldn't make any changes to since the ratio of the toppings is important in keeping the pizza delicious but still light. Don't worry about the lack of sauce, the caramelized onions make a delicious substitute, but they also remind me of how much I love chopping onions but hate caramelizing them. Enjoy the following eye-candy, or should I say, eye-pizza.


Ready for the oven...

....and with the magic of the interwebs, it's done!


Sunday, December 5, 2010

Where's Amanda?

Poor Down 2 Eat, I'm sorry I've been neglecting you! In case you have wondered where I've been, I got a new job. I work full time as a Social Media and PR Specialist for an online gourmet food store.

I have two blogs there:

Edible Antics - recipes, cooking tips, and general food fun.

A Gourmet Wisconsin Cupboard - gift ideas and showcasing gourmet food from Wisconsin.


And you can follow @Wisconsinmade on twitter.


I'm not sure what's going to happen to Down 2 Eat. With 4 posts a week at work I'm all "blogged out" by the time I get home, but I definitely come up with some ideas that don't fit in to my work blog for whatever reason that might be fun to post here. Whatever happens I am so happy that I have a job doing what I love- talking about food! And I don't think I could have done it without Down 2 Eat. Stay tuned.


Tuesday, October 5, 2010

Quest for the Best Mac and Cheese

I love mac and cheese. I don't know many people who don't, but I can't make a blue box without scarfing the whole thing. Even if I put half of it in my bowl, and pack the other half away in the fridge, I can feel the magnetic pull of the processed cheesy goodness. I try not to even keep it in the house, but Phil ends up buying it because he loves it just as much, if not more, than I do. Our house rule: Don't make mac and cheese unless the other person is there to help you eat it.

We also want to implement the "No junk food unless you make it yourself" rule. Which has sent us on a quest to find the best mac and cheese recipes. I tried the first one for Phil's birthday. I was drawn to this recipe because it calls for one of my favorite ingredients: chipotle in adobo. The secret ingredient was also featured in my Holy Chipotle post (I apologize for the cutesy post titles, I am trying to get away from that!!). The other 2 "smokey" flavors are from the paprika and the smoked cheddar cheese.


The verdict? Phil and I both loved the unique smokey flavor and the buttery bread crumbs are awesome! My one minor issue is that I prefer my macaroni and cheese creamier. On the blog where I found the recipe (herbivoracious.com) commenters described it as creamy, so maybe I cooked it too long? I still haven't figured out my fickle oven. Check back for more updates on the great Mac and Cheese Quest!

Triple Smokey Macaroni and Cheese

1lb elbow macaroni
8 tablespoons butter, divided
4 cups cubed bread
2 cloves garlic, minced
1/4 cup AP flour
4 cups whole milk
1/2 onion, finely diced
1 tablespoon smoked paprika
1 teaspoon rosemary, minced (I used dried)
1 chipotle pepper (canned in adobo sauce) minced
1 teaspoon oregano
1/4 tsp nutmeg (freshly grated if you have it)
8oz smoked cheddar grated
8oz mozzarella grated
salt to taste

1. Bring a large pot of salted water to a boil. Boil the macaroni according to package directions, but be sure not to cook it too long because it will bake more in the oven. Drain and toss with 2T of butter.
2. Put the bread in a food processor and pulse until you have some coarse bread crumbs. Heat 2T butter in a skillet over medium heat, add the garlic, a pinch of salt, and the breadcrumbs. Cook, tossing frequently, until lightly browned. Set aside to cool.
3. Preheat oven to 350 and grease a large baking dish. Unless you have an oven like mine. In this case you probably should have pre-heated a few hours ago.
4. In a medium saucepan, melt the remaining 4T of butter over medium low heat. Sprinkle in the flour and whisk pretty constantly for 3 minutes. Whisk in the milk. Add the onion, smoked paprika, rosemary, chipotle, oregano and nutmeg. Simmer, whisking occasionally until it begins to thicken.
5. Gradually whisk in the grated cheese, stirring each batch until incorporated.
6. Taste the sauce, and adjust the seasoning as needed. Add more spiciness if desired. Remember that the sauce should be strong because it is going to be diluted by a pound of pasta.
7. Stir the macaroni into the sauce. Pour the macaroni into the pan.
8. Top with the breadcrumbs.
9. Bake for about 30 min or until you can see bubbling around the sides and the breadcrumbs are browned.
10. Let stand 5-10 min before serving.

Mozzarella and smoked cheddar. Wonder how it would be with smoked cheddar AND smoked mozzarella? I do live in Wisconsin so there is no shortage of cheese!
Making a rue!
Look at all the yumminess swimming in the milk!

I could not WAIT to try it at this point.
Yes, those bread crumbs are as yummy as they look!

Wednesday, September 1, 2010

Family Recipes: Crowd Pleasing Cobbler

I have been making this cobbler recipe for as long as I can remember. It has all the qualities that I love in a recipe: easy, quick, and standard ingredients that come together to make a simple yet simply awesome dish. This cobbler is a go-to dessert in my family and hopefully it will be one in yours too.

My mom refers to this recipe as "Blueberry Stuff", but as you can see I used peaches when I took the pictures. Peaches and blueberries together are also delicious. The combination of the fresh-out-of-the-oven cobbler and the cold ice-cream melting on top is totally heavenly.

"Blueberry Stuff"
Original Recipe from Southern Living Magazine
Adapted by the Maurers

4 cups of blueberries, peaches (sliced), or a combination of the two (4 cups = 2 pints of blueberries)
about 1T lemon juice for sprinkling
1 egg
1 cup flour
1 cup sugar
3T melted butter
vanilla ice-cream

1. Preheat oven to 350.
2. In a 13x9 inch baking dish*, arrange the fruit and sprinkle with lemon juice.
3. In a food processor, combine egg, flour and sugar. Blend until the mixture is course and resembles corn meal.
4. Sprinkle the mixture over the fruit.
5. Bake for 30 min. or until the crust is starting to brown and the fruit is bubbly.
6. Serve while still hot topped with vanilla ice-cream.

*the dish in the picture is smaller because I wanted to try it crustier, but I think I like with less crust better because you can taste the fruit more, but you can do it either way if you like more crust.

Toss the crust ingredients in the food processor...
...it should look like this...
....the fruit...
...top with the crust...

...butter makes everything better!
Golden brown, yum!
Vanilla ice-cream is a must!


Thursday, August 26, 2010

Aarti's Sloppy Bombay Joes


I like Indian food, but I don't have a huge attachment to it since I never ate it growing up. Mom hates the smell of curry and Dad tends to avoid anything that's too flavorful. Phil (my bf) on the other hand, loves Indian food. He has been talking about finding some easy but tasty Indian recipes for awhile now. It was all talk until we started watching the show Next Food Network Star.

Right from the beginning, we loved Aarti. She cooked the exact food we were wishing for- Indian flavors with American elements to make them a little more familiar. Not to mention she is a food blogger! When Aarti won the show, Phil and I let out a big "YEAAAHH!". How cool is that? From food blogger to her own show on Food Network? I'm a little inspired.

So in honor of Aarti we made a recipe from her first show: Sloppy Bombay Joes. I always get excited about cooking, but this recipes was especially fun since my kitchen was filled with new scents. The taste did not disappoint either. Here's the recipe with some of my tips and comments along the way.

Aarti Party at Amanda's house!
Photo: Food Network Website

Sloppy Bombay Joes

Ingredients

Sauce:
2T vegetable oil (I cut back on the amount of oil throughout, 1T is plenty here)
1 T minced ginger
2 cloves garlic, minced
1/2 serrano chile, seeded and finely minced ( Aarti puts the chile in the sauce and the meat, but I just put it in the sauce since I am in denial about how much spice I can handle and didn't want to over do it. I'm glad I cut back this time, but next time I might try the whole amount.)
1t garam masala (An Indian spice blend, they didn't have it at the normal grocery store, but I found it at World Market, along with lots of other affordable spices, but that's for another blog...)
1/2 teaspoon paprika
1 (15oz) can tomato sauce
1 cup water

Turkey:
3-4 tablespoons vegetable oil (I probably used 1T here as well)
small handful shelled pistachios, about 1/4 cup ( Make sure to get some extra to munch while you cook!)
small handful of raisins, about 1/4 cup
1t cumin seeds
1/2 large white onion finely diced
1 red bell pepper, seeds and membrane removed, finely diced (I used a green pepper)
1/2 serrano chile, seeds intact, not chopped
Kosher salt
1 pound ground turkey
1/2 teaspoon honey
1/4 cup half-and-half (I used milk)
small handful chopped pistachios
4 - 6 hamburger buns

Begin by making the sauce: Warm the oil in a medium saucepan over medium heat, until it shimmers. Add the ginger, garlic, and serrano pepper. Saute until the ginger and garlic brown a little. Add the garam masala and paprika and saute for 30 seconds. Stir in the tomato sauce and water. Bring to a boil, then reduce the heat and simmer, uncovered until thickened, about 15 minutes.

Meanwhile for the turkey, in large skillet, warm 2 tablespoons of oil. When shimmering, add the pistachios and raisins. Cook until the raisins swell up and the pistachios toast slightly. Remove from the pan and set aside.

Return the pan to medium heat, add 1 to 2 more tablespoons of oil, and warm until shimmering. Add the cumin seeds and allow them to sizzle for about 10 seconds, or until some of the sizzling subsides. Stir in the onions and bell pepper, saute until softened and starting to brown. Add the serrano pepper. Saute for another couple of minutes, seasoning with a little salt. Stir in the turkey, breaking up the big lumps. Cook until opaque, about 5 minutes.

Meanwhile, your sauce should be ready. Pour the sauce into the skillet with the turkey. Stir and bring to a boil, then lower the heat and simmer until the mixture has thickened slightly, about 10 minutes.

Once the turkey is cooked and the sauce has thickened a little, remove the serrano pepper. Add the honey, half-and-half, pistachios and raisins. Stir through and taste for seasoning. Before serving, garnish with fresh cilantro.

Toast the buns, fill with the turkey mixture and serve.


The ingredients for the sauce, prepped and ready to go.
The ingredients for the turkey.

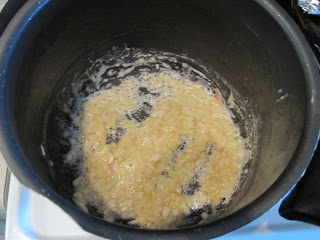
The ginger, garlic, and serrano peppers- trust me, you wish you could smell it!
The sauce.

The raisins and pistachios add a ton of flavor and texture, don't skip out on this part.
The sauce and the meat, if it seems too runny, just let it cook a little bit longer.
Not the prettiest meal ever, but trust me, it's yummy, and tastes even better as leftovers the next day!

Wednesday, August 25, 2010

La Tomatina


Like most days, today I came home from work and began to browse my favorite food blogs. I saw a message board post that reminded that La Tomatina was today! For those of you that don't know, La Tomatina is an annual festival in Bunol (pronounced boon-yol), Spain. It's a giant party, the world's largest food fight, and an amazing cultural experience. How do I know? I was in Bunol up to my waist in tomatoes for La Tomatina 2009!

The roots of the festival, as I understand it, go back to a random food fight that occurred in a market back in the 1940s. Every year, the town had a tomato fight to commemorate the day. When General Franco (evil Spanish dictator) came into power, he banned all festivals and anything fun. Once Franco was removed from power, the town celebrated their freedom by having an even bigger festival.

Now, bus loads and bus loads of tourist (many from Australia and New Zealand) come into the town to celebrate. Participants are advised to dress in old clothes, not to carry anything on their person that they don't want to loose, and wear goggles (they help, a little). Girls are warned- your shirt WILL be ripped off- so wear a sports bra or one piece swimsuit underneath. I had my friends ceremoniously shred my tank-top so it wouldn't be removed by a stranger.

Before the event, locals cover store fronts and homes with tarps, and some set up tables and chairs outside their house to watch all the crazies. The official events begins at 8am, when food fight participants climb a greasy pole to retrieve a ham (if you have spent any time in Spain you know that everything is about the jamon). Once the ham is removed, dump trucks full of tomatoes roll into the streets and tomatoes start flying. The whole town becomes a sea of screaming tomatoey humanity. The tomato throwing goes on for exactly one hour, when a flare goes up and all tomato tossing must stop or you could be arrested (!). You may be wondering how this mess gets cleaned up. The locals all pitch in and hose down the tourists.

The next couple days, I had several showers but still found the occasional tomato bit in my hair. Plus I couldn't get the tomato smell off of me and my eyes were all crusty from the tomato acid. Would I do it again? Well, I probably wouldn't go out of my way to get there again since there are so many other fun adventures I want to have first, but if given the opportunity, I probably would do it again! I highly recommend La Tomatina to any adventurous travelers out there. Let me know if you have any questions about it!


The "before" pic: Amanda (me), Scott, Rosemarie

Beer for breakfast? Why not!

So much fun I want to punch my friend Rosemarie!

Does that look fun? Well, it's WAY more fun than it looks!


Thursday, August 19, 2010

Ground Cherries? Gooseberries? Physalis? Tasty!

In the parking lot of the shopping center I work at there is a farmers' market on Thursday, and I usually stop by after work. I picked up 2 zucchinis, 2 summer squashes, an onion, 4 poblanos and a bunch of basil. Not because I had any plans for these items just because a) I like them and b) they were on sale. As I was leaving I noticed a vendor selling "ground cherries". Seeing a good learning opportunity I asked the vendor what they were, he described them as "little sweet tomatoes" and let me sample one. They were yummy! They have little husks around them and the consistency of a tomato but sweetness of a berry.

Some people have a little devil on one shoulder and an angel on the other. I ,on the other hand, have a tight-wad cheaper than Ebinezer Scrooge on one shoulder and a food snob on the other. At $4 a pint the tightwad got the best of me, but as I walked away, the foodie started arguing her case- "You don't need to use all these veggies at once, and plus you have a food blog and this is a great chance to use a local ingredient you've never tried before. Go back and get those dumb cherries!" So, I did.

As soon as I arrived back at the apartment I asked google what the heck a ground cherry is, and then I realized they are gooseberries. Now this I've heard of, not sure where, probably a secret ingredient on Iron Chef. After consulting my Le Cordon Bleu cookbook (thanks Phil!) I found the following description.

"Physalis (yet another name) - also called cape gooseberry, this sweet orange berry is encased in an inedible husk of papery leaf- like sepals. Eat raw or cooked, or use as a flower-like decoration."
And on page 322, a recipe!

I continued with my adventurous attitude and ignored the fact that I had never made my own caramel or worked with hot motel sugar before. I survived without burninateing anything, and my candied gooseberries look just like the picture! They taste good too, maybe not worth the mess... but I learned a new technique AND used a new ingredient. Not to mention I took some great photos. All in all, a successful day in the kitchen.

What do YOU do with gooseberries? A quick google search revealed recipes for pies, cobblers, salsas, chutneys.... any recommendations?

Tuesday, August 10, 2010

Better Than the Bux: Banana Chocolate Chip Coffee Cake

I work at a coffee shop here in Madison. In fact, you probably have a similar one near you since there seems to be one on every street corner. I try to avoid eating the pastries, since my mindless snacking the first day of work put me over my daily calories before 11am. The coffee cakes always tempt me, especially the Banana Chocolate Chip variety. Phil's family was visiting from out of town so I decided to recreate it for them. At least that way I wouldn't down the whole batch myself. Well, I solved my pastry munching problem in an unexpected way- my homemade coffee cake put the store bought cake to shame! My new problem is that I can't stop thinking about my "Better Than the Bux" cake.

Banana Coffee Cake with Chocolate Chip Streusel
Adapted From Bon Appetit - January 2003

12 servings

1 bag semisweet chocolate chips- 1 1/4 cups for streusel, mix the rest in the batter
2/3 cup packed brown sugar
1/2 cup chopped pecans
1 tablespoon ground cinnamon
1 1/2 cups AP flour
3/4 teaspoon baking soda
3/4 teaspoon baking powder
1/4 teaspoon salt
About 3 very ripe, mashed up bananas
3 tablespoons of sour cream

Preheat oven to 350 degrees F. Butter and flour an 8-inch square baking pan.

Streusel: Stir chocolate chips, brown sugar, pecans, and cinnamon in a small bowl, set aside.
The Dry Team: Sift flour, baking soda, baking powder and salt into medium bowl.

Using electric mixer, beat sugar, room temperature butter, and egg in a large bowl until fluffy. Beat in mashed bananas and buttermilk. Add dry ingredients and blend well. Fold in the extra chocolate chips, if desired. Come on, you know you want to!

Spread half of the batter (about 2 cups) in prepared baking pan. Sprinkle with half of streusel. Repeat with remaining batter and streusel. Bake coffee cake until tester inserted into center comes out clean, about 45 minutes. Cool coffee cake in pan on rack.


The ingredients- mostly stuff you probably have on hand.

The streusel ingredients....
...mix them up!
The dry team. Note: These pictures are of a half batch.


The wet team. I broke the yoke, opps!
The bananas and 3 tablespoons of sour cream.
My $5 mixer from the thrift store works just nicely.
Here's the part where Amanda says BAM! Extra chocolate chips!
Ready for the oven!

Fresh out of the oven, yum!
The final product! Phil says my extra chocolate chips make this more like breakfast brownies, but I see nothing wrong with that.

Comments!

Bloggers love to see comments on their posts and I am no exception. My Aunt told me that she wanted to comment on my last post but couldn't unless she signed up for a google account. I investigated the problem and it is now fixed! So comment away! Even if it is just to say "hi".

Thursday, July 29, 2010

What If Your Food Isn't "Just Fine, Thanks!"?

You may have noticed in my last post I planned on writing about the restaurant I dined at last night for restaurant week. Alas, I have decided not to blog in detail about my experience since...well, it wasn't a great experience. Actually, I take that back, the company and conversation was awesome, the beer was cold, but the food left something to be desired, like a kobe beef burger that's not cooked to death, or a salad without any "extra protein"...I don't ask for much!


Which brings me to another interesting topic, what, do you say, if anything, if the food at a restaurant is bad? Issues like bugs in the salad are obviously unacceptable, but truth is, we didn't say anything! We were just having a great time and didn't want to start even the tiniest of confrontations. Looking back, we should have said something, but seeing as it wasn't my salad I didn't want to push the issue.

As if the foodie gods were testing my limits, the waitress came by and said "wasn't that burger GREAT?" and I faked a "Oh, yeah! Great!". I have heard of this phenonmenon of people saying the food is fine even when it's not, and here I am being a part of it. After carefully considering the issue, I have two reasons why I didn't say anything:

1) I was hungry and ate a little more than half the burger before giving up. Kind of tacky to complain about food after you ate half of it.
2) What do you say that doesn't make you sound like a total food snob? " I was expecting awesome and your burger was mediocre at best. Is this your definition of medium?..." I admit it, I am particular about the quality of my food, but I still want to be a nice person, plus, to some people, my waitress included, that burger was perfectly awesome.

What would you do? If a server or the manager comes around and asks you how your food was, are you honest about it? Do you vote with your wallet and never come back? Do you go home and slave over a slanderous Yelp review?

If anyone is out there reading my blog, this is your chance to comment and let me know you are here!


Not the actual bug! Photo: Flikr

Wednesday, July 28, 2010

Restaurant Week in Madison

It's restaurant week in Madison! Brought to you by the letters E, A, and T and the number 25. $25 dollars that is, because that's how much a three course dinner costs at participating restaurants. I'm starting to sound like a commercial, you can read the fine print here: Madison Restaurant Week.

Last night I went to Liliana's, a restaurant serving New Orleans style fare just outside of downtown Madison in Fitchburg. I have driven past Liliana's on multiple occasions and judging by the exterior decor only, I wanted to try it. Big windows, outdoor seating...after asking around, a few friends agreed that the food was great as well. There were three dinners on the restaurant week menu to choose from, and I went with the seafood heavy one: the Bayou menu.

My starter was four barbecued rock shrimp, which put Phil's starter (some fried okra and a salad) to shame in both looks and taste. The fresh, succulent, head-on shrimp transported me from ocean-less Madison to a beach side restaurant in Valencia, Spain where the head-on shrimp adorn the top of a savory paella. Obviously these shrimp had traveled some distant from the sea to my belly, but I would never have guessed by the taste.

My main course consisted of a catfish fillet on a bed of southern goodness: greens and grits. Despite growing up in Virginia, I haven't had greens in recent memory. This makes me sad, because they tasted like bacon. I'm sorry bacon flavored leafy vegetables... for not eating you more often when I had the chance. Meanwhile, the catfish and grits had just the right amount of spice for me. Like the appetizer, the entree was a little on the greasy side, but that's just more flavor, right?

Finally, I finished the meal off with a chocolate filled beignet. Now the Chef isn't getting any creativity points for beignets at a New Orleans restaurant, but tastes is what matters and this square chocolate filled donut was simply delicious. After my first bite the waiter came over and asked me if I was enjoying it, I thought about saying "Didn't you hear me moaning?"... but decided to keep the unlady-like comments to myself.

I give this one two governator thumbs up...I'll be back!
Amanda's entree: Catfish with Grits and Greens

Phil's entree:Red Beans and Rice with Andouille Sausage

I'm checking out the Restaurant Week scene again tonight so check back soon!

Tuesday, July 13, 2010

Crazy Caprese

In my last post I showed you how a few simple pantry staples can make a tasty shortcake to enjoy with summer fruit. Continuing on with the simple and seasonal theme, this week I made a flashy salad. But don't worry, it looks and tastes flashy, but is super easy to make. Just slice up a 2-3 tomatoes (different colors make it fun), and 1 ball of fresh, whole milk mozzarella (the kind that is chilling in the brine pool is the best). Layer the tomatoes, cheese, and some basil, then drizzle with olive oil and balsamic vinegar. I like a pinch of salt on mine too. YUM!

I'm also helping out my community since I bought the tomatoes and basil at the Madison farmer's market. Even on a budget, I like to eat responsibly when I can. Buying locally ensures that the food I eat doesn't have to travel, which makes it freshers and therefor, tastier! Yummier food is only one of the reasons to buy and eat local food, to read more, check out the REAP's Food Group website: Why Buy Local


I don't know many tricks, but one I do know: the cutting board shot.


...but this trick is pretty impressive, too!

Friday, May 28, 2010

Susie's Shortcake


The best part about this recipe is the simplicity to happiness ratio. I know shortcake makes me really happy, but it has a special place for Phil because his mom used to make it. Then, she hand wrote the recipe with love and now I'm making it for him an taking all the credit, mwahaha! No, just kidding, the credit definitely goes to Susie. This shortcake proves that the best food is simple and from the heart. Awww, let's all hug like its the end of an episode of Full House.


Susie's Shortcake
Adapted by Amanda

Ingredients:
2 cups flour
2 teaspoons baking powder Fun fact: BP is what makes it shortCAKE and not shortBREAD, thanks Wikipedia!
1/2 teaspoons salt
1/4 cup sugar
5 tablespoons oil
2 tablespoons melted butter
3/4 cup milk

1. Mix together all the ingredients. First time I made it I just dumped the hot butter into the cold milk and the butter got all clumpy, but the cake turned out fine. Second time I made it I slowly added the hot butter to the milk, no clumps this time, but I don't think it made a difference in the final product, so dump away!
2. Pour into a greased pan. I used 9in round metal pan and Phil says Susie does too, you could use a loaf pan.
3. Bake 12-15min at 425.

Serving suggestions:
-Strawberry shortcake- serve up a piece of cake with sliced strawberries and cool whip, or real whip cream if you are feeling fancy. You could even try different kinds of fruit, I bet peaches would be awesome.
-Shortcake and Milk (Phil's favorite)- Put a piece shortcake in a bowl, add some sliced strawberries, pour on some cold milk. Great for breakfast.


Susie's handwritten recipe, with Phil and Amanda's shopping list for burgers on the right. If you were thinking smoked mozzarella and bacon don't go well with shortbread, you are right.
The ingredients- I bet you have all this stuff in your pantry. What are we waiting for? Start cooking!
So easy- ingredients in the bowl...

...mix...


...put in the greased pan...


...bake...


...and serve!